Woodworker's Journal 2004 Summer, страница 24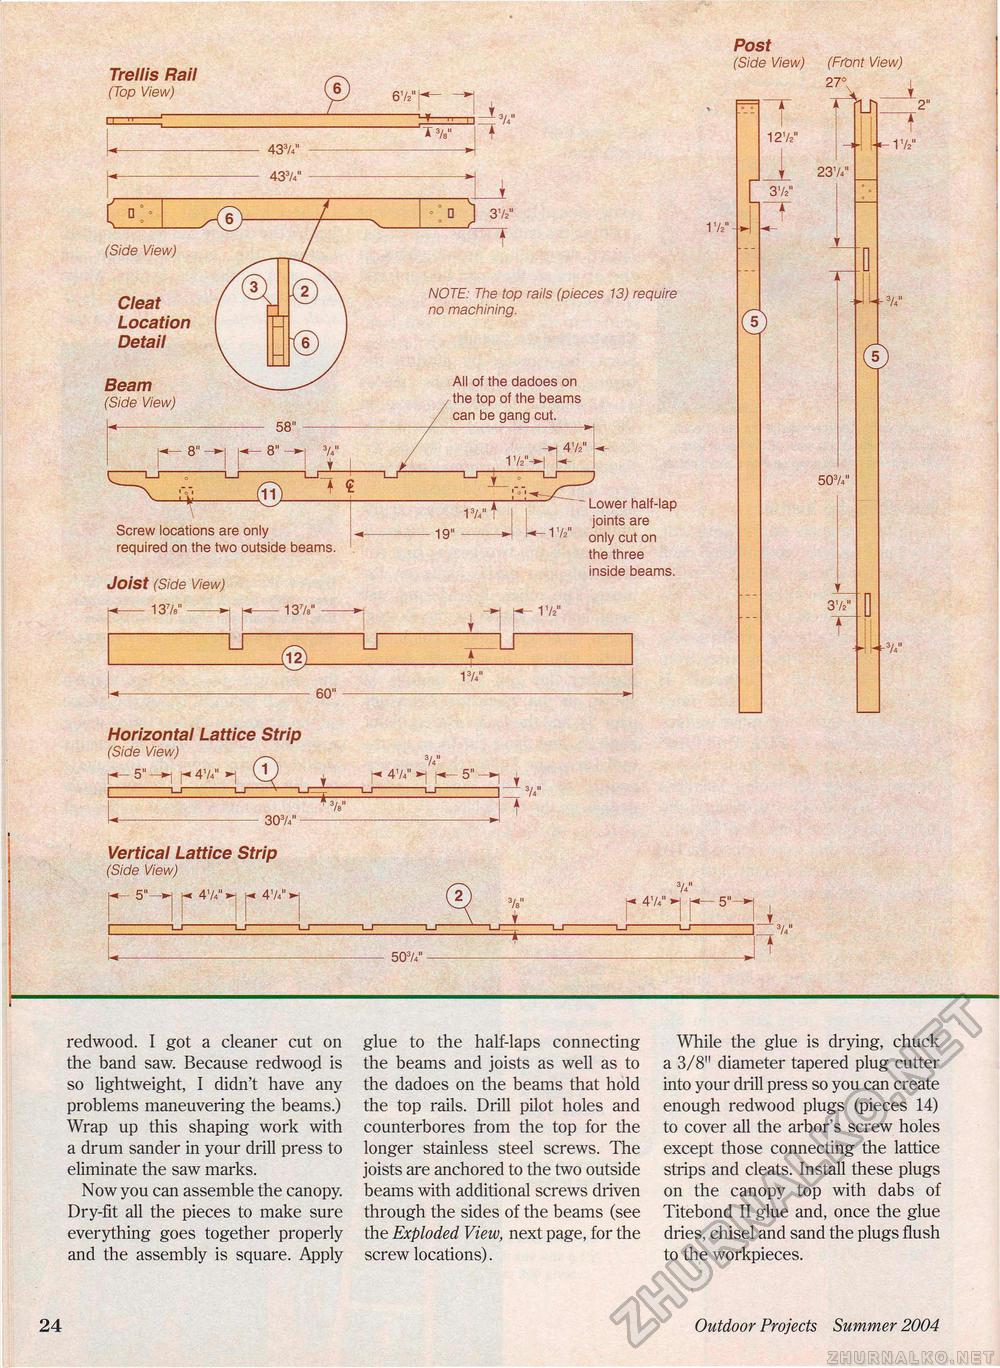
Trellis Rail (Top View) Post (Side View) (Front View) 67/^ 27° 7V 4374" 1'/2"-J Beam (Side View) 58" All of the dadoes on the top of the beams can be gang cut. 74" 1 i ~i—r JL_ I 4.V2" Screw locations are only required on the two outside beams. 174' 19" Joist (Side View) — 137." 1 137e" r Lower half-lap joints are 11/2 only cut on the three inside beams. «- 172" Joist (Side View) — 137." 137e" «- 172"
T 1272" 372" \ 2374" © Jl 5074" 372" T A ~T -172" 2" 74" © 74" Horizontal Lattice Strip (Side View) r41/4111 vV * 1-i_i—-L_J-- 74" [« 474" »-| f* 5" —1 -1 ^ IJ 74" 3074" - Vertical Lattice Strip (Side View) 5"- —p 474" p 47." »- 47.". 74" 5074" - redwood. I got a cleaner cut on the band saw. Because redwooji is so lightweight, I didn't have any problems maneuvering the beams.) Wrap up this shaping work with a drum sander in your drill press to eliminate the saw marks. Now you can assemble the canopy. Dry-fit all the pieces to make sure everything goes together properly and the assembly is square. Apply glue to the half-laps connecting the beams and joists as well as to the dadoes on the beams that hold the top rails. Drill pilot holes and counterbores from the top for the longer stainless steel screws. The joists are anchored to the two outside beams with additional screws driven through the sides of the beams (see the Exploded View, next page, for the screw locations). While the glue is drying, chuck a 3/8" diameter tapered plug cutter into your drill press so you can create enough redwood plugs (pieces 14) to cover all the arbor's screw holes except those connecting the lattice strips and cleats. Install these plugs on the canopy top with dabs of Titebond II glue and, once the glue dries, chisel and sand the plugs flush to the workpieces. 24 Outdoor Projects Summer 2004 |


